Best Ways To Make Your Photos Into A Commercial Signage

Are you in need of some of the best ways to make your photos into commercial signage? Are you in search of signage for your car wash, ice cream stand, or even just a fast-food restaurant? Well, there are some great ways to customize these signs and make them so much more noticeable and popular. Here are a few great suggestions.

commercial signage

Custom signs are a great way to advertise your business because they can be made to order to match your specific needs and preferences. Commercial signwriters are professionals who have mastered the art of creating commercial signage. They can take your images and text and create signage that will help bring customers in and drive up sales. Here are some of the best ways from the expert to make your photos into commercial signage:

Use a car wash sign. Some car wash owners use signage on the windows of their facility. You can do the same thing with an ice cream shop or restaurant. Car wash signwriters often have skills in advertising design, so you will have a great deal of control over the look of your sign and what it says.

Use signage at an ice cream store. Many car wash owners opt for signage on the storefront because it’s easy to see. Plus, the signage draws in customers who are looking for ice cream while they are waiting in line at the store. The signage in an ice cream store is simple but attractive. Signwriters can also write reviews of the various products and services offered at the store which is great marketing for the owner.

Place signs in restaurants. Commercial signwriters can create beautiful signs and menus for restaurant businesses. You can place signs outside the front door and inside to let customers know about special offers and promotions. This is a great way to attract new customers.

The top 3 commercial signage techniques are great ways to make your photos into a commercial sign. You can easily find signwriters online to help design and create your signage. Once you have created your signage, it’s important that you maintain the signage regularly. This will ensure that the business will continue to attract new customers. If you keep your commercial signage clean, attractive, and well maintained, it will attract more customers.

Think outside the box when it comes to signage. Signage can be used for any business. You can display outdoor signage at a storefront or along a busy street. It’s important to choose a great style that stands out from other signs. You can even display outdoor signage on your own building. You can use these signs on the sidewalk or in front of your building.

When you are looking for the best ways to make your photos into commercial signage, it’s important to consider the different options you have available. If you take your time, you can come up with a great design. You can choose from modern signs, colorful signs, or custom signs. No matter what your budget is, there are commercial sign designers that will help you design the perfect commercial signage for your business.

How To Start Trees Photography

One of the best ways to start tree photography is to get your camera ready as soon as you have a shoot that suits you. You may be a seasoned photographer, but if you are a beginner in tree lopping or tree photography, it is important that you consider how to start taking photographs that will give you more satisfaction and make you look more accomplished. Of course, the first thing that you need to do is to find out more about tree lopping and tree photography. By gaining more knowledge, you will know what to expect from the photography business, what are the different things that you have to consider when choosing the best tree service for you, and how to take photos that will make your customers marvel at the photography skills that you have.

Best Ways on Starting trees Photography


Tree services are growing in numbers nowadays. There are now more tree service companies than before and many of them offer tree lopping services. When looking for a tree service provider, it is a wise idea to choose one that offers a variety of services instead of specializing in just tree lopping. This will ensure that they can cater to different needs, such as tree removal, tree trimming, tree surgery, tree dressing, tree pruning, and other services. These are all services that you can use when you need tree services.


Before you choose a Tree Lopping Brisbane Northside tree service provider for these tree lopping or tree removal services, you need to know their prices. Find out what they charge per tree and per year. If they offer tree lopping services, find out if they charge extra money when they do tree lopping, or if they will charge you for the labor costs separately. It is better to deal with a tree service company that charges a flat rate for all their tree services, whether you are tree lopping or tree removal. Some tree services will even help you plan where you want the tree to be put.


Another important factor to consider when choosing a tree service company is the safety of their employees. Check to see how many employees the tree service company has and whether their employees have proper training. You should also ask your potential tree service provider about their insurance policy. Find out if they have liability insurance and professional indemnity insurance. Most tree service providers take these insurance policies seriously and most of them will have at least the minimum amount of coverage.


When you are tree lopping or tree removal, you don’t want to end up harming yourself or your surroundings because of the tree you decided to remove. This is why hiring tree photography is a very wise decision. A tree service provider will be well equipped with the necessary gear to get good-quality photographs of your tree. They will also have the necessary knowledge and experience to make your tree photography perfect.


In this digital age, one of the best ways to keep your trees healthy and beautiful is to hire tree services providers to do tree lopping and tree removal. As we all know, trees need extra care and attention in order to grow properly. Having tree lopping and tree removal professionals do the job professionally will ensure that you get to enjoy your trees for years to come. Remember, trees are an important part of your landscape. If you don’t have trees in your landscape, now would be the right time to add them. Take your time to choose the right tree care service provider and enjoy all the beautiful trees you’ve been missing.

Photography Tips for Beginners

Photography may not be just a simple skill that could save us, but it would be more than that. It could have lots of joy, mainly while you tricks of it and how to use the things for photography, what you have at your disposal to the best and to the fullest. There are plenty of tips and tricks that could help the beginners in enhancing their  art of photography, or at least in building their basic knowledge, as well as skills of it. For instance, here are few simple tricks for beginners to improve the visual value and the quality of ordinary photos.

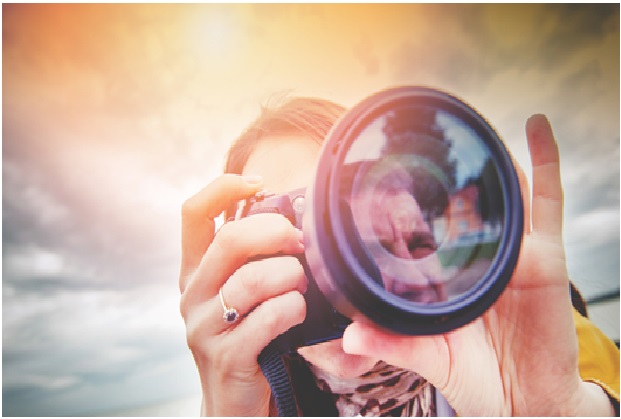
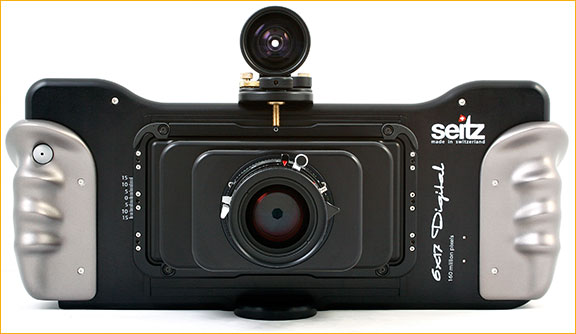
It’s always better to use the Camera you already have

In present world, though there are plenty of lenses, cameras and other accessories available. Most of the people generally spend a lot of time reviewing all them in web photography and it’s known true that you could find few are better than others. However, once you have thoroughly checked enough of them, then the real takeaway is the best you have selected and most of the options today is excellent. The differences are almost always negligible, mainly at a given specific price. So it’s best to use the camera that you already have and it’s also best to not to look back. For example, though modern DSLRs are better than the past SLRs ever were, still film photographers with those old SLR’s has managed to capture awesome photos still look great today.

So, mainly concentrate on your effort on those and not on continuous reviewing and collecting camera equipment.

Clearly Understand Camera Angles

The main thing you have to keep in mind to get best photos are, be aware of the tilted camera. For example, if the horizon is not at the level, then the photos could be of disorienting. Also it is better not to shoot from either too far above the subject or took below the subject or from too far to the side.

Better to avoid fad editing techniques

In photography and fashion, always concentrate on fads. Social media is saturated with photos made with selective over-vignetting, glamour glow and sepia coloring, and that’s the best for daily stuff. But if you are working on something that you require to really last, stick with your quality techniques over Instagram filters.

Framing and Composition are the Keys

Usually in the photography tips for the beginners, this point would have special attention to composition and frames. This is mainly because of the fact they could extreme change the way of photos appear. Even expert photographers agree that changing them is the prime things even while shooting motion is considered. So always be ready to adjust positions, alter focal length, to adjust positions and to maintain the height from the place you take pictures. On the other hand, it’s also a good idea to change distances at same time by adding some background elements. All these compositions could prevent your photos from looking like shallow. The same you have to do with frame too. You have to choose not only the exact compositional object, but also you have to verify the entire frame. Make sure that there are no unnecessary objects that could ruin the photo. Paying attention to all these points could set you on a higher level on the photography ladder.

Best Ways to Make Your Photos Look Professional

No magical powers or super quality equipment required to make a professional or high quality picture. It often just require some years of practice. But for the normal people, they could find that there are few easy ways that would dramatically enhance their photography without spending much effort or more time. Here are such few easiest ways you can apply and can see a drastic improvement in your photos.

Crisp The Sharpness

There are many factors that impact sharpness of a photo that it is very complicated to find out exactly which factor is causing a reduction in sharpness in your photos.  But by checking out thousands of photos, it is proven that actually the problem is related the photographer not getting the focus quite right. While clicking the photo of any one person specifically, it is very important to keep the focus point exactly on the person eye so that the sharpness can be enhanced to extreme levels.

Don’t concentrate on subject too much

Exactly taking the photo to an interesting subject is usually the easiest part of photography.  Even normal people know that some things are more interesting in a photo than the other things. But the actual thing is totally different to it. It is not totally that you have to find something very interesting to shoot, but you should also be careful that you have not too taken by the subject.  If you are too excited about the subject, it could make you easy to forget about all of the other things on this page.  So capture an interesting subject, but once you have found it, then you could little bit take of your focus bit from the excitement and can pay attention to everything else you need to do in photography. A skill in photography is somewhat a work of a Plumber Service in Caloundra they tend to avoid excitement to finish their work abruptly rather they pay much attention to the quality of work they could give to each of their clients. 

Have no Aberrations

Aberration in photography are nothing but some unwanted things that stay in the photo which doesn’t belong in the picture. These aberrations could make the photo to look more cluttered with unwanted distractions that keep the viewer from exploring and enjoying the real subject. These aberrations mostly be around the frame edges. It could be very simple for the photographer to have enough attention to the person to whom they are taking the photo, and to forget about the unwanted trash in the background, a bad looking wire in the distance, etc. So, it’s best to choose an exact subject by zooming in the pic very tight. If you are feeling complicated in getting an exact composition that make sense, then mostly issue would be that you have picked too many subjects at once.  So, focus on just single subject that will be the center of attention, by which you can have a much more interesting picture. Zooming in on one part  is the best things to get professional photo for new photographers.

Always Capture Interesting Lighting

Lighting is the main that is required to improve the quality of photo.  It is easily most overlooked photography aspect for normal people and for beginning photographers, but expert photographers always obsess about it and focus more on it.  It’s the main thing that could make a photo look professional. Lightning mainly highlights the subject and could present it in a best way. There are  plenty of ways to make the portrait photo have more exciting lighting.  You can just make the person to be in the shaded region to have on the face, the even spread of, or you can make them to stand back of the sun so that the hard shadows of them don’t fall across their face.

Tips To Enhance The Photo Quality In Mobile Phones

With high-end mobiles becoming most important gadget to own these days, it could be very excited to use the camera app that comes along with your phone for something far more exotic and advanced. And mainly, if you know what you are exactly doing, then you could easily get some attractive as well as high-quality results from the default camera app on your Android or Microsoft or Apple devices. Here are few techniques that help you out of it.


Apply the HDR mode automatically

All the latest phone camera apps consists a feature called HDR. Both in IPhone and Android phones, you can find this High Dynamic Range, shortly called as HDR filter in your camera app located on the right of screen. These HDR applies High Dynamic Range filter while the suits it. This High Dynamic Range, in mobile photography allows to keep the lightest and darkest areas of the photos in balance . This option It requires a longer exposure. So while you use this feature, you have keep your phone as steady as you can.

Use the physical shutter button

Keeping your phone in a steady position and then pressing out the shutter button to take the photos could be always the easier task as it often cause your hands or mobile to shake while you are taking the shot. So the solution for this problem is to either use the volume buttons to click the photos (works on most of the android phones and all the iPhones)  or to set the timer to click on the photo. Though this is not going to be always the best option, surely it is the useful alternate.

Change your focus

Whether you are having an Android device or an IOS device, you could simply click on the the screen anywhere to vary the focus of the photo. This change would also vary for level of exposure let you match the spot you have selected. It is the best way in thickening the darker area. iPhone users can click and can keep on holding, to lock the exposure and focus, so that it stays standard even while the phone shakes. You can also hold and drag up to manually change the level of exposure. You can observe sun symbol indicating the changes.

Check our rule of thirds

The rule of thirds is the main thing that let you to frame your shot by mobile phone correctly. Just you have to imagine your shot as split up into the 9 sector rectangles, and then keep the vital elements and objects  running along these lines or close to the intersections where they meet. With the best camera apps for IOS and Android, you don’t have to visualize these lines yourself. For example, on Android device, you could tap the menu button and can choose the settings and then show grid in viewfinder. Whereas, in iOS device, you could go to Photos and Camera in the main Settings app and can click on the Grid switch.

Creating Your Own Panoramic Photos Without A Panoramic Camera

Have you ever seen an impressive panoramic photo and thought, “I wish I had a camera that would take photos like that?” Fortunately, if you have a camera–you can take panoramics! This type of photography is easier than you think. All you need are a consistent series of photos and a process called “stitching”. There are several software programs available that include this tool. I prefer to use Microsoft Digital Image Suite.

Start out by setting up a tripod. A tripod is not required, but it does help in keeping your camera steady. Make sure the camera is mounted level to the ground or horizon and zoom out slightly more than you expect the image to appear. The reason for this is because stitching the photos together will require you to slightly crop the image as a final step.

Begin taking your photos from the left (or the right if you are from Europe!) Your first photo should target the extreme end of the scene you are trying capture. For the remaining photos, the thing to remember is to overlap the previous photo by about 30%. Later on, when you stitch these together, the software will automatically piece the series of images by detecting that overlap.

Have you ever seen an impressive panoramic photo and thought, “I wish I had a camera that would take photos like that?” Fortunately, if you have a camera–you can take panoramics! This type of photography is easier than you think. All you need are a consistent series of photos and a process called “stitching”. There are several software programs available that include this tool. I prefer to use Microsoft Digital Image Suite.

Start out by setting up a tripod. A tripod is not required, but it does help in keeping your camera steady. Make sure the camera is mounted level to the ground or horizon and zoom out slightly more than you expect the image to appear. The reason for this is because stitching the photos together will require you to slightly crop the image as a final step.

Begin taking your photos from the left (or the right if you are from Europe!) Your first photo should target the extreme end of the scene you are trying capture. For the remaining photos, the thing to remember is to overlap the previous photo by about 30%. Later on when you stitch these together, the software will automatically piece the series of images by detecting that overlap.

If creating panoramics is something you would like to try, here are a few hints:

  • Make sure not to adjust the zoom while snapping the series of photos.
  • Focus each shot exactly the same as the previous shot.
  • Use a tripod to make sure your photos are steady, level, and consistent with the horizon.
  • Avoid capturing a close moving object such as a person or car.
  • Refrain from using a polarized filter. This could affect the color of the sky across your final image.
  • Be consistent in the overlap of your photos.
  • Crop the final stitched image for a finished look.

Choosing A Digital Photo Frame

There are many factors to consider when buying a digital photo frame. In fact, there are so many models and so many different features that the decision can become a little overwhelming for some people. As with any purchase, you should consider how the product will be used and what the most desired features are for the people using the frame.

For some, the most important consideration is the look of the photo display. The goal is to get large, sharp images with vivid colors. If this is the main consideration, then look for a digital frame with high resolution. The common resolution choices are 640×480, 800×600 and 1024×768. These numbers represent the number of pixels per square inch. The higher the resolution, the sharper the image will be. The screen size is also a factor, but just remember that with two frames with the same size screen, the one with the higher resolution will provide better photo quality.

The display screen ratio refers to the ratio of the width to the height of the photo display. The majority of frames will have a ratio of 4:3 which displays a 4 x 6 inch photo without any distortion. Frames with a 16:9 ratio will display photos with a widescreen look and work well for displaying HD formatted photos.

For others, the ease of loading photos is a big concern. You may be looking for the easiest way to add lots of photos without much difficulty. If you plan to simply insert a memory chip with the photos, almost every frame would work. If you would prefer to transfer the photos wirelessly, then check into some of the newer models that include this feature.

Another feature to consider is the amount of internal memory, if any. If you want to be able to store photos on the device itself, look for a frame with internal storage. The range here will be start at about 16MB and go up from there.

There are many more advanced features to choose from if your needs and tastes go beyond simply displaying photos. If you are interested in browsing the internet or streaming music there is a frame for you. Some frames will edit photos for you, reducing red eye, adjust the brightness, etc. Choosing a digital photo frame is like getting the right Plasterers Brisbane to work for your home to make sure you are expecting the perfect touch in your walls.

Once you have your list of desired features together, you can check out your local camera, electronics and discounts stores. There are also a huge amount of digital frames available online, so you could do a quick search and compare to find the perfect frame. It is also a good idea to check out the reviews of people who have already purchased the product. Happy shopping.

Getting Started in Bird Photography

If you want to start photographing birds and want to get some decent shots, you are going to need some basic equipment. The first thing you will need to get is a decent digital SLR camera. You can use a compact camera but you will soon realize that you need to get a lot closer to the birds to fill the frame of the shot.

I, myself, like Canon but the best thing to do is have a look around at a few reviews of the different SLR cameras out there and then decide which one to go for. To start with I wouldn’t go for brand new unless you can afford it. eBay is a great place to look for second-hand cameras and believe me there are some fantastic bargains on there.

The next thing you are going to need will be a decent long focal length Telephoto lens. There are absolutely loads of these out there and for the beginner, it can be a daunting task to know which one to buy. The Canon EF 100-400mm L lens is one of the bird photographers favorite and if you search in Google you can see a review of this lens. This is a very good lens but can be out of the price range for most people just over £1,000 at the time of writing, especially if you are just starting out.

Another good lens which you can purchase for around half the price of the Canon lens on eBay is the Sigma 150-500mm which is also very good and a lot of bird photographers use this lens. It is again your choice as to which one to go for but I would definitely recommend that you review the lens from an unbiased site to make sure that it is the best one you can get for the price that you are paying.

The next thing you will need to buy is a tripod to stop camera shake which will blur your shots if the correct shutter speed isn’t selected (more on this on another post). Again which one you buy is your choice but you will need to think about the weight of the tripod, it needs to be quite lightweight as you may need to carry the tripod plus your camera over some great distances. It will also need to be very sturdy as you are going to get some knocks on it at some stage. Another thing you will need to consider is how low the tripod can be set as this can be very handy for taking photos of ducks on the water for example. Whichever one you choose make sure that it’s not too cheap because 9 times out of 10 you will end up having to buy another one. There are some good tripods from Redsnapper at reasonable prices, to be honest, I’m thinking of getting one of these myself.

OK, that is it, your basic kit for bird photography. You will always want to add to it as you go and you will read about this great lens that someone else is using. It is very addictive and you will find yourself wanting to buy the best kit that you can afford, but for now, this basic kit will be fine.